HOME
ABOUT KEN'S
MENUS
FUNCTIONS
LIVE MUSIC
VIP CLUB
RESERVATIONS
CONTACT
More...
95 Worcester Road (Route 9), Framingham, MA | 508-875-4455
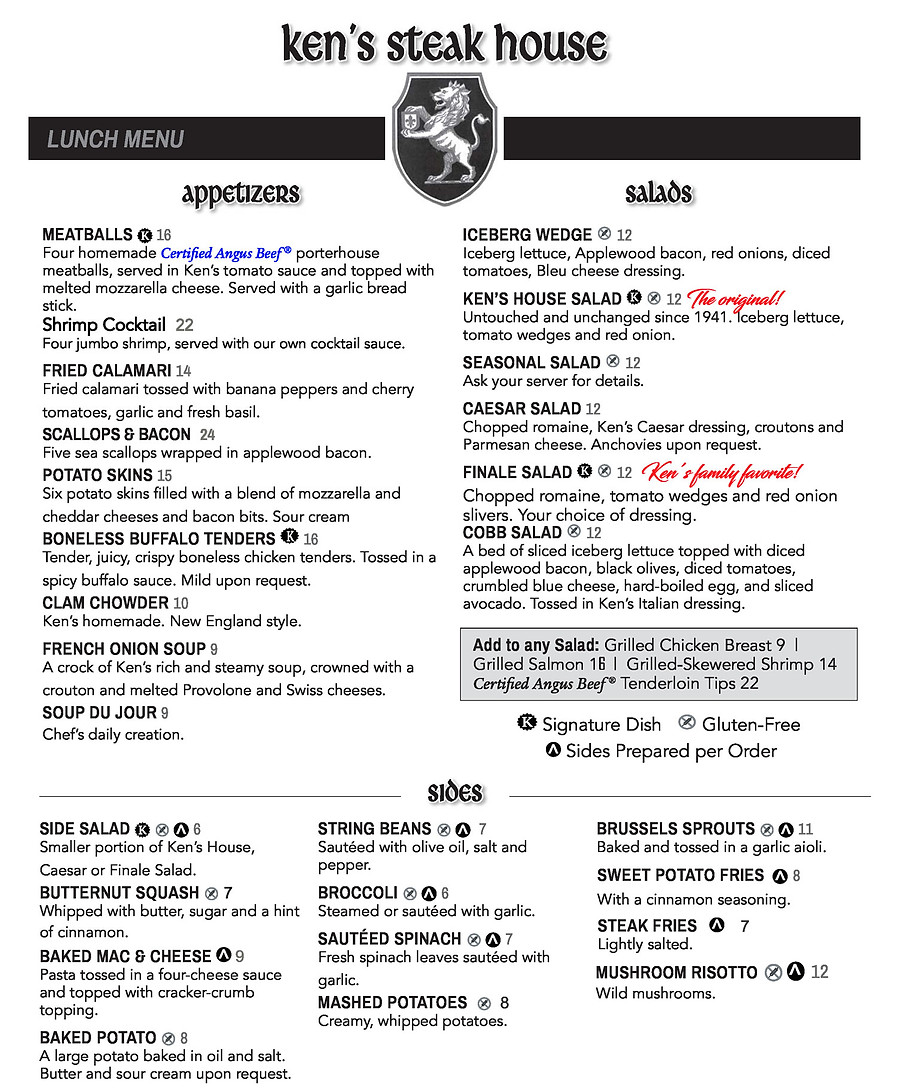
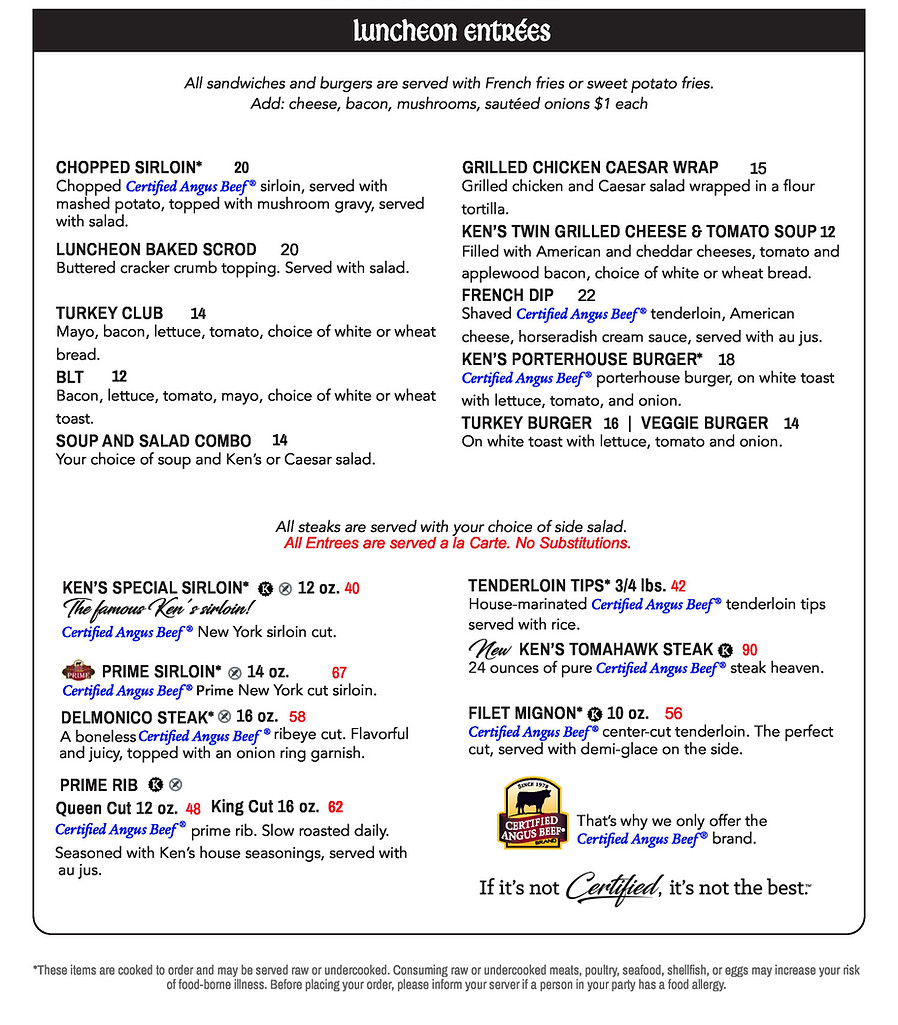
Lunch Menu